Lab Setup
Purpose
The purpose of this chapter is to assist RadioWare instructors as well as teaching assistants in ordering equipment and supplies as well as setting up a functioning laboratory environment for their students. The RadioWare laboratory exercises utilize two bench configurations: a Student Team Bench and a Lab Assistant Bench. Each lab section will have one Student Team Bench for each group of 2-3 students as well as 1-2 Lab Assistant Benches. The equipment, connections, software, and other configurations of these benches are described below. Finally, the instructors and teaching assistants will prepare an Educational Radio Kit for each student group as outlined in this document.
Student Team Bench
The Student Team Bench provides intermediate frequency (IF) test and measurement capabilities, power supplies, and a desktop computer for instrument control, visualization, and software development. An example Student Team Bench is pictured below.
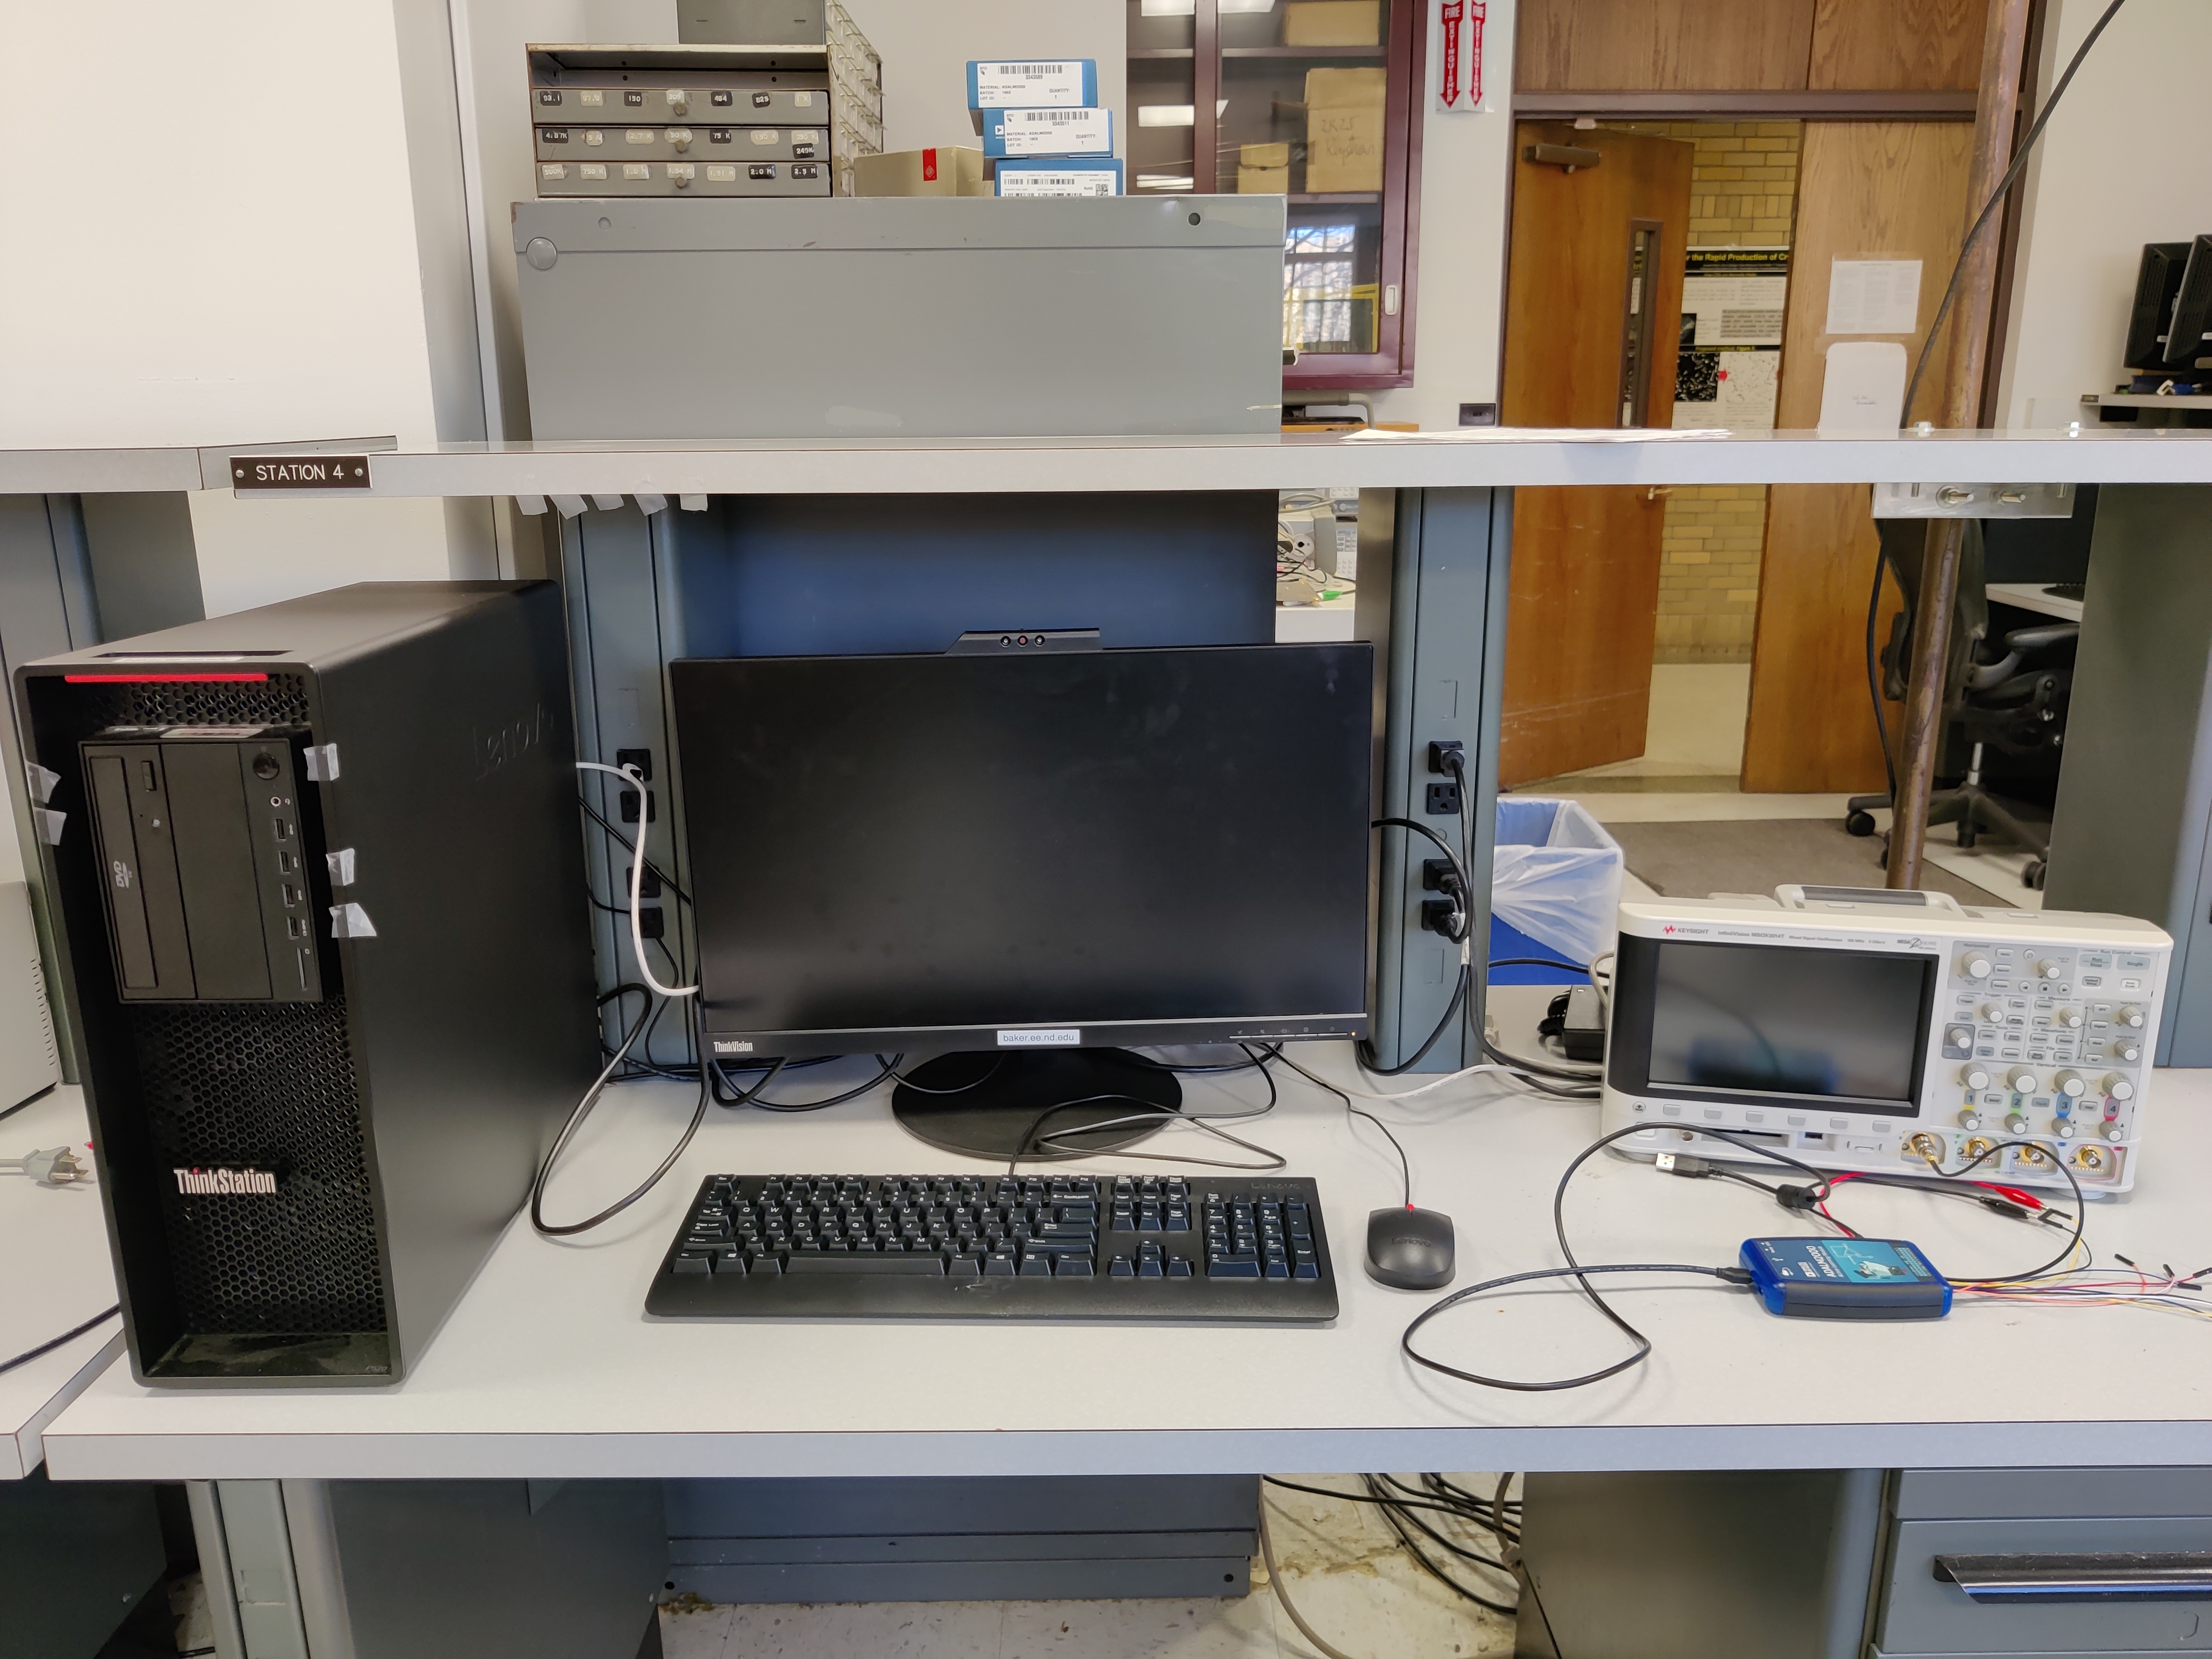
Components
The components and minimum requirements for a Student Team Bench include:
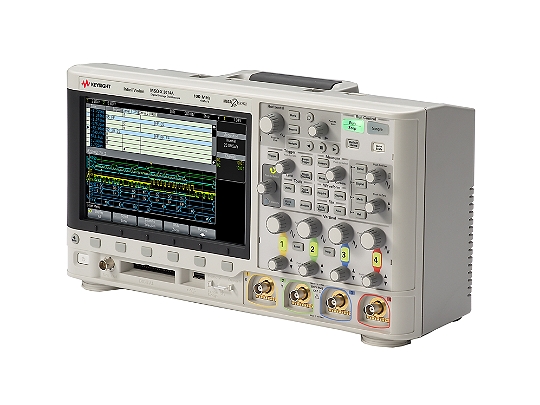
Intermediate Frequency (IF) Mixed Signal Oscilloscope
- At least four (4) analog input channels
- At least sixteen (16) digital input channels
- At least 100 MHz input bandwidth
- e.g., Keysight MSOX3014T
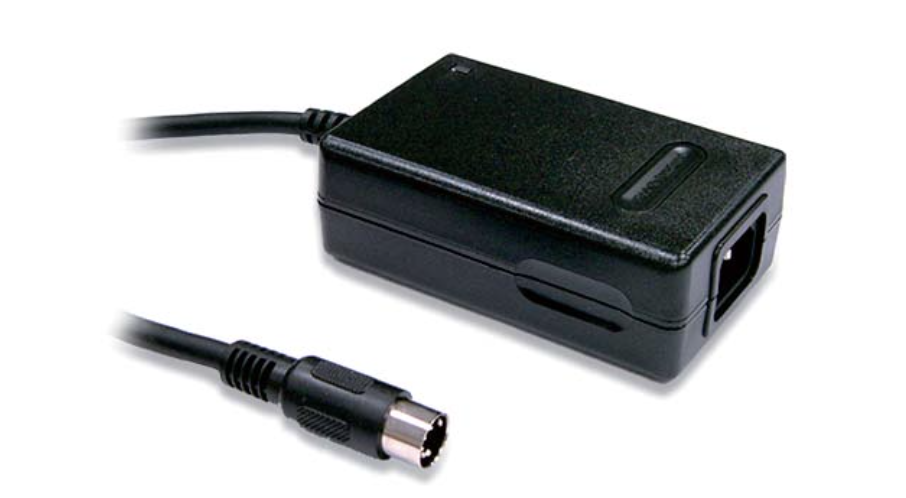
Wall Power Adapter
- 3 pole AC inlet IEC320-C14, Class I power unit
- Offers the output voltage sets +5V/+12V/-5V
- e.g., MEAN WELL GP25A
Desktop Computer and Display
Setup
- Set up the desktop and the monitor. Connect them with the given cable.
- Connect to LAN port. Open web brower and visit any url. You will be directed to Notre Dame network registration. Register the computer with your NDID. Visit Lenovo’s support page and download the integrated camera driver thinkvision_t24v_20_driver_202004.zip
- Ensure that the monitor and the desktop are also connected via the USB 2.0 cable (type B). Install the integrated camera driver. In windows use ‘camera’ app to test if the camera works correctly.
- Connect the FieldFox with the desktop via USB 2.0 cable (miniB).
- Connect the oscilloscope with the desktop via USB 2.0 cable (B). On the scope front panel, go to utilities->I/O configure and write down the USB VISA address. We will use this address to control the scope.
- Install the required software on the desktop.
Lab Assistant Bench
The Lab Assistant Bench complements the Student Team Bench with high-frequency test and measurement capabilities, a laptop, and mobile power source. An example Lab Assistant Bench is pictured below.
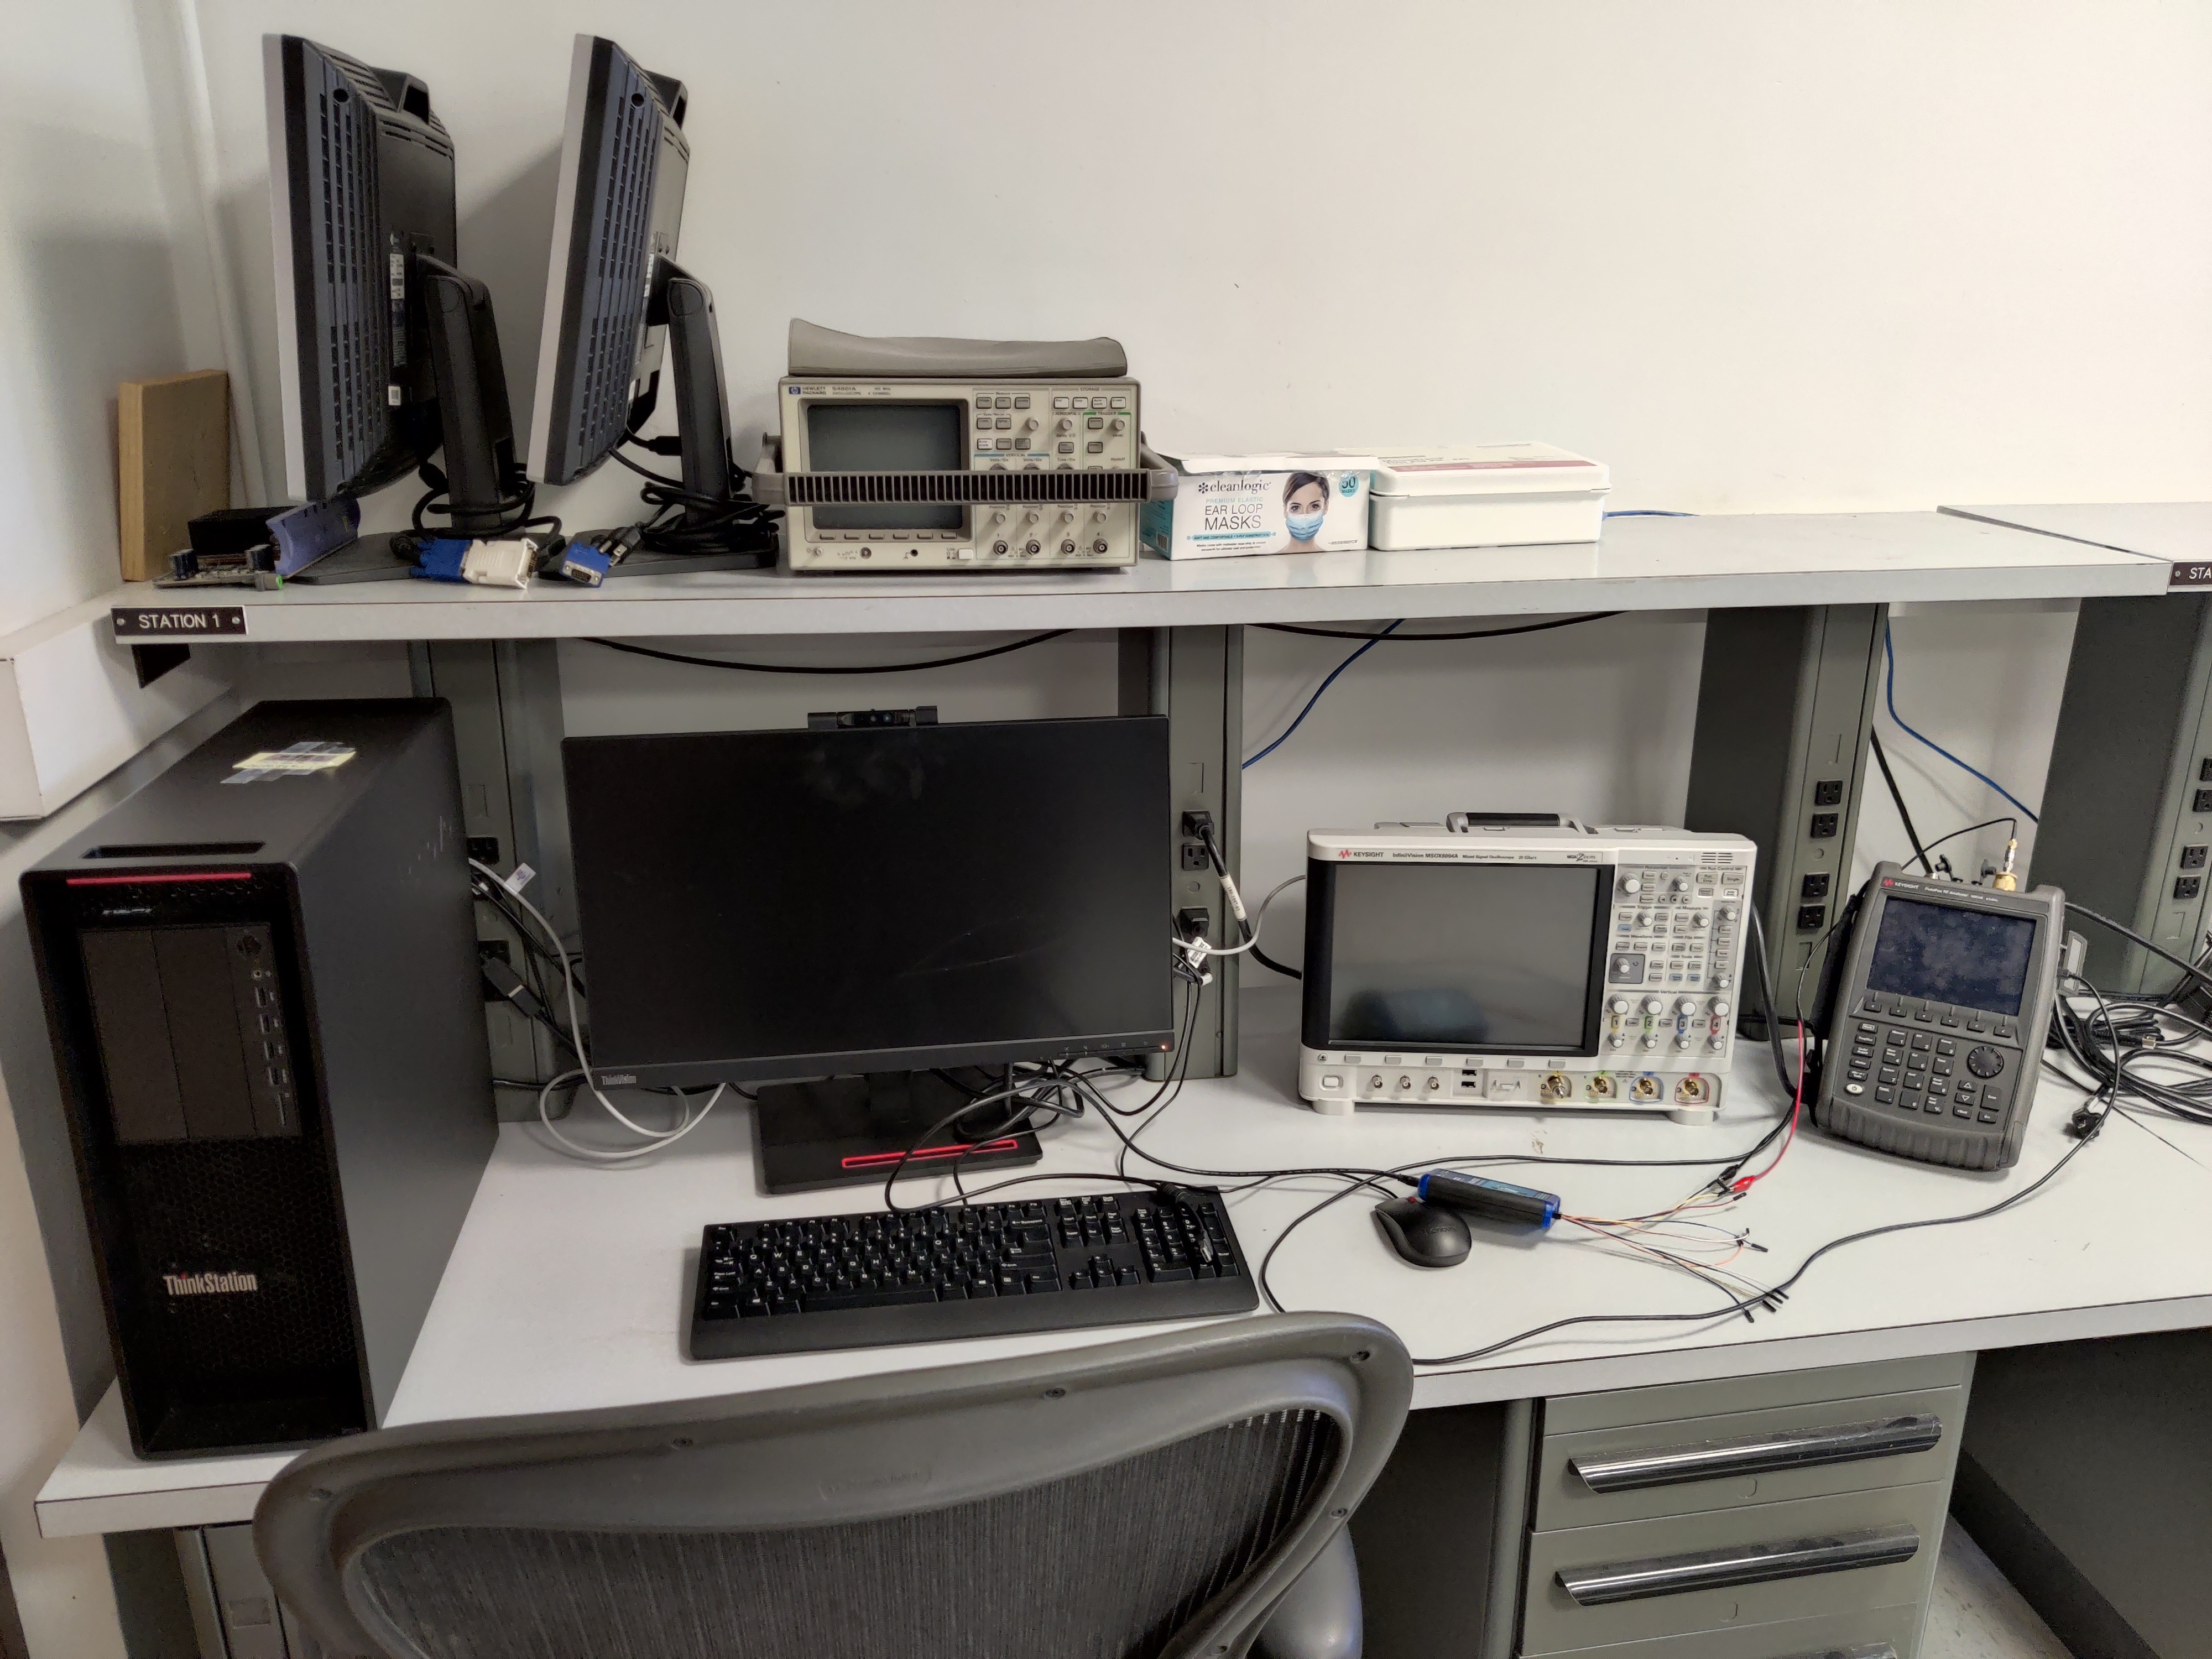
Components
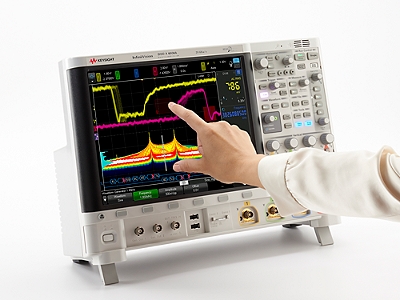
Radio Frequency (RF) Oscilloscope
- At least four (4) analog input channels
- At least sixteen (16) digital input channels
- At least six (6) GHz bandwidth
- e.g., Keysight MSOX6004A with DSOX6B10T604BW option
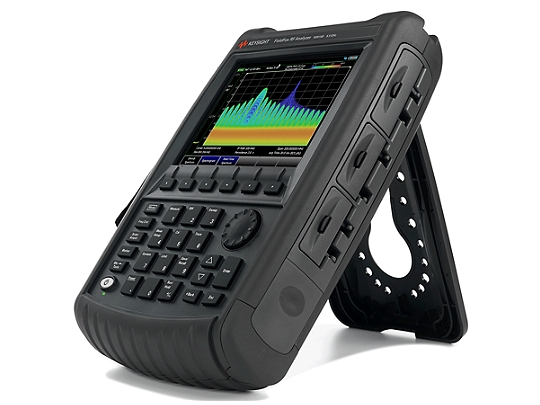
Radio Frequency (RF) Portable Spectrum Analyzer
- Frequencies up to six (6) GHz
- e.g., Keysight N9914B
Desktop Computer and Display
Mobile Power Pack
Wheeled Cart
Storage
Setup
The setup is the same as the student bench setup.
Educational Radio Kit
Each student team also requires an Educational Radio Kit, which has an estimated cost of $1250. An example Educationl Radio Kit is pictured below.
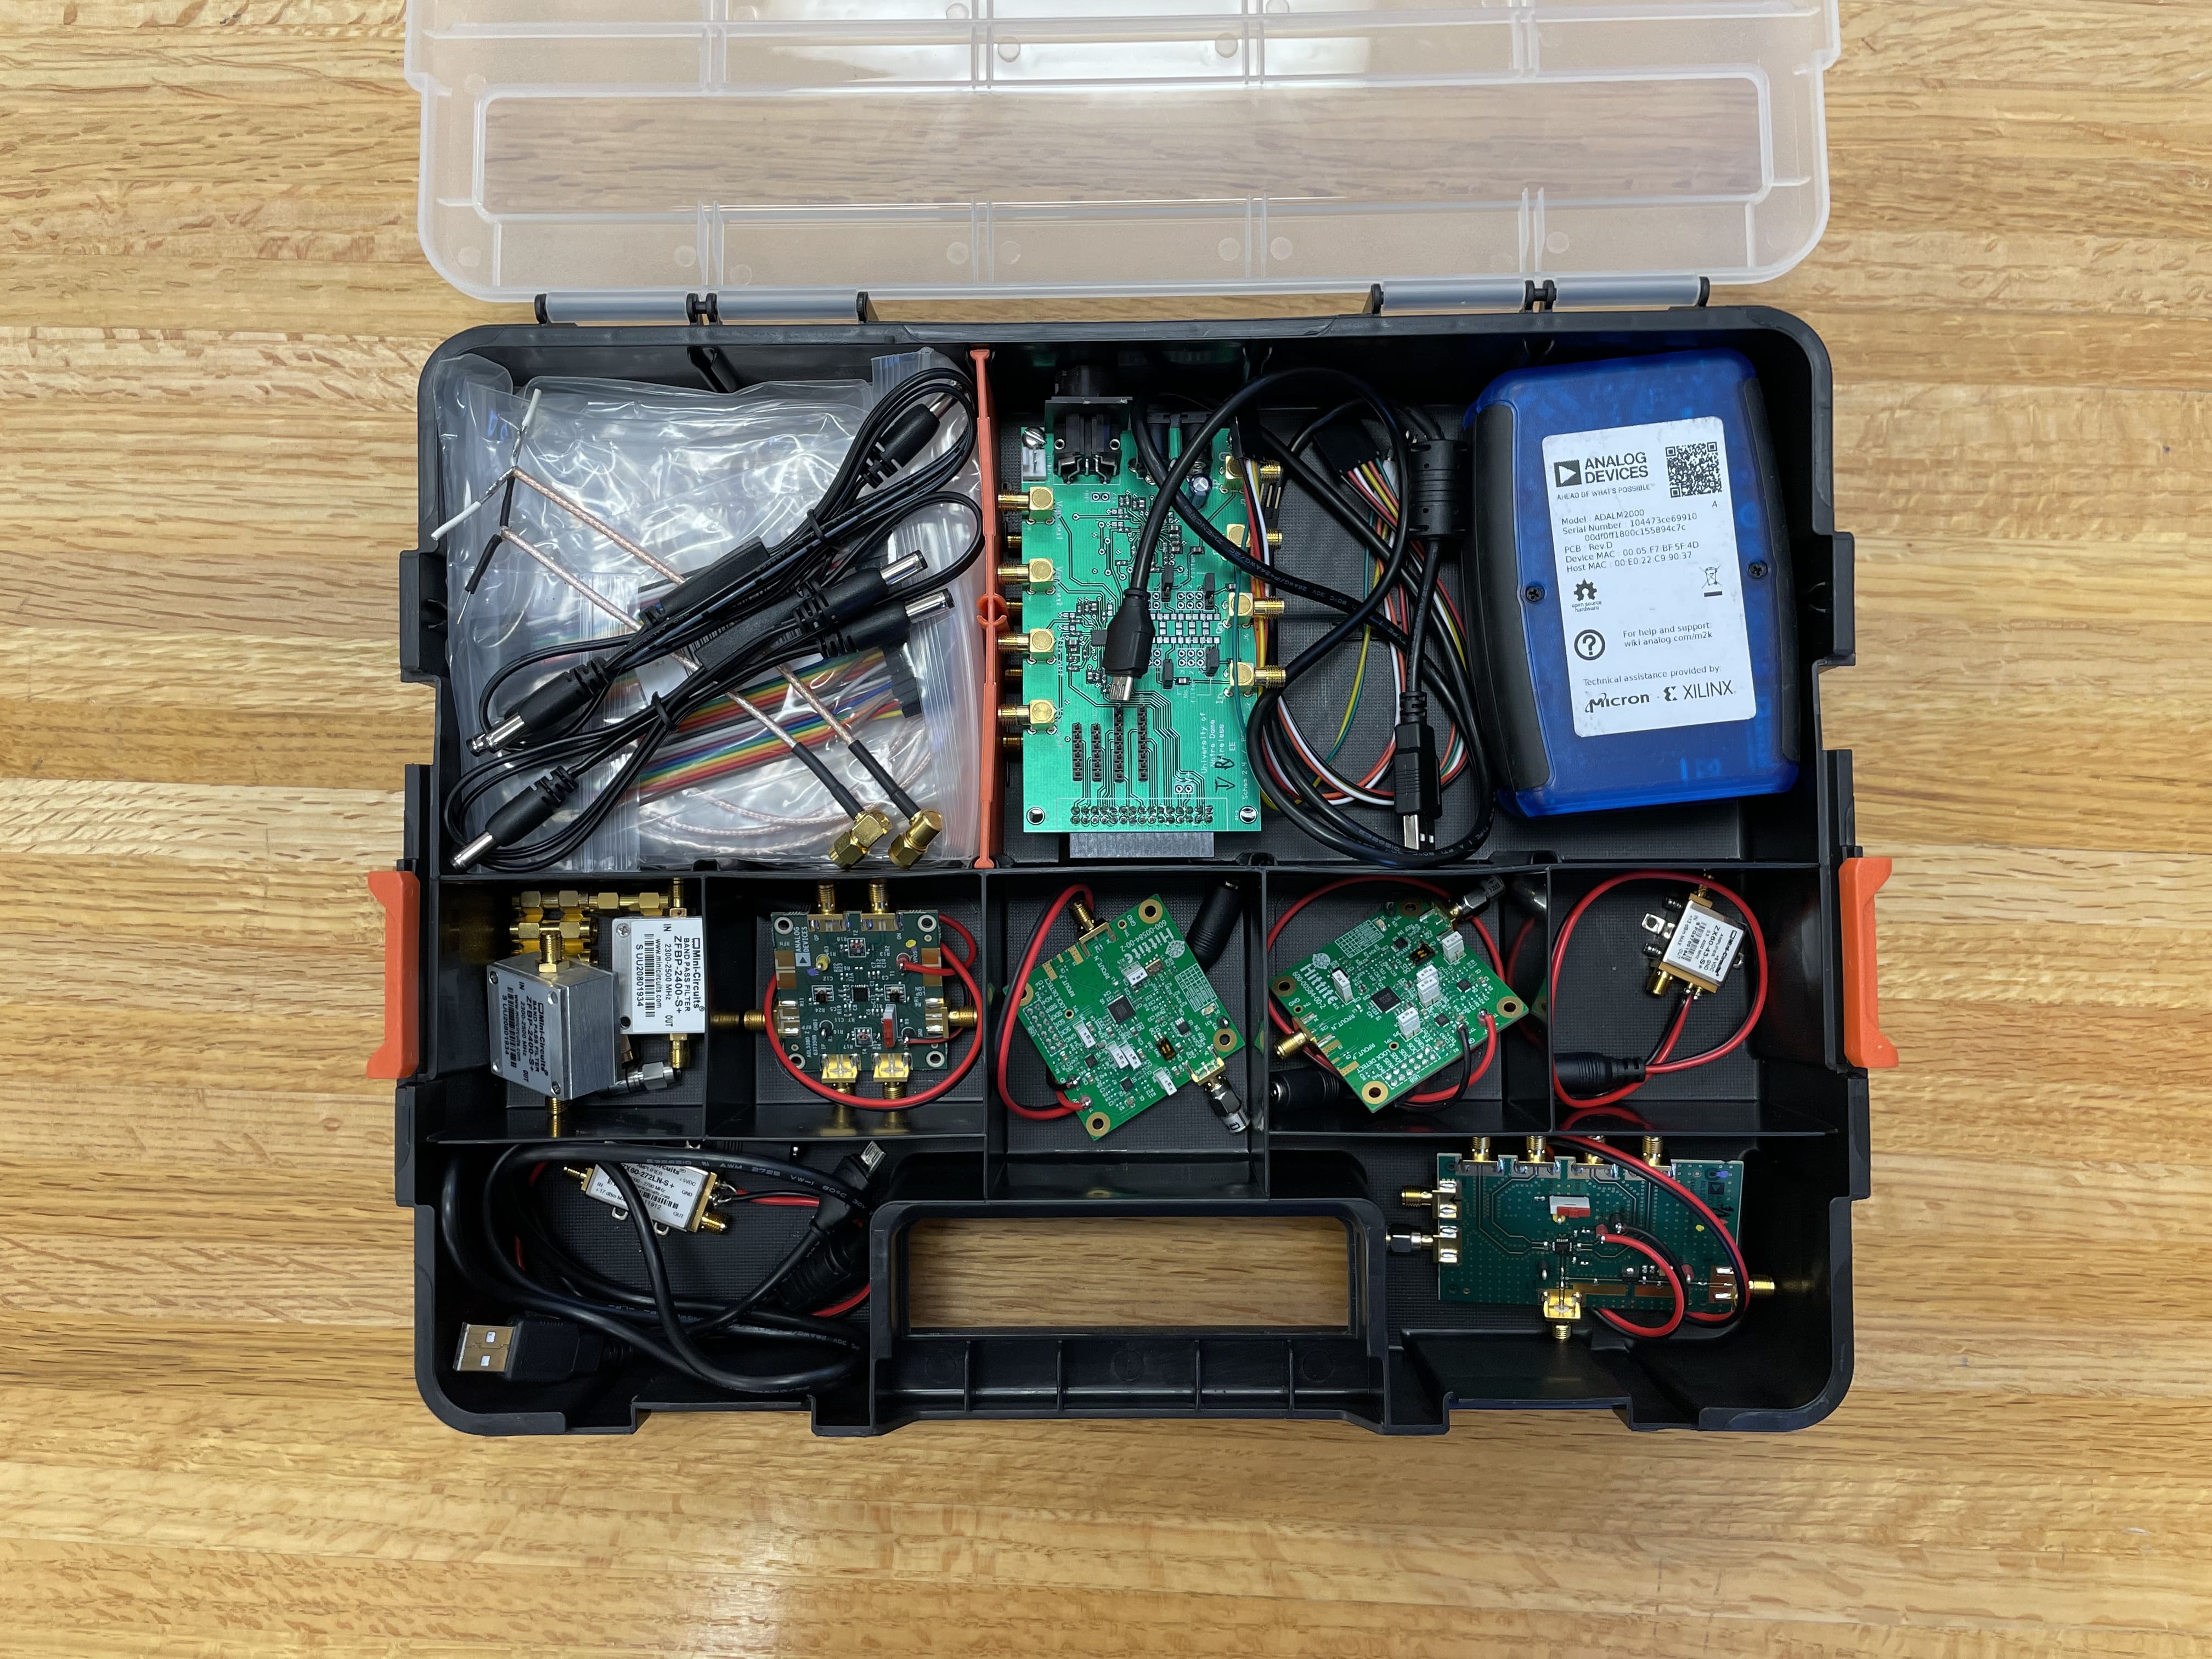
The parts list for each Educational Radio Kit is as follows.
Each Educational Radio Kit is provided to students in an organizer, e.g., XXXX.
Software Installation
This section summarizes the high-level requirements and selected software components. Each semester the course development team surveys the software landscape to update this section, with an emphasis on keeping the number of dependencies and constraints and small as possible, and the installation instructions as robust as possible.
Although much of the software is compatible with various operating systems including Linux and Mac OS X, these instructions are for the laboratory computers with Windows installed. Users of other operating systems who come up with a robust set of installation instructions are welcome to share them with the course development team for inclusion on this document.
High-Level Requirements
The high-level software requirements for the RadioWare courseware are as follows:
- Interface support selected hardware, including: ADALM-2000, ADALM Pluto, and Keysight Test and Measurement Equipment
- Numerical Python, including Python, NumPy, SciPy, Matplotlib, JupyText and Jupyter Notebook
- Link performance applications, including FFmpeg, iPerf, and Wireshark
Hardware Dependency Analysis
Because the hardware is so critical, we start with a review of the state of hardware drivers, their requirements, and baseline installations. From this analysis, we determine the additional software that must be installed.
ADALM-2000 / ADALM-Pluto Drivers
LibM2K
- Webpage: https://github.com/analogdevicesinc/libm2k/releases/tag/v0.5.0
- Requires: ADALM Pluto/2000 drivers and Python 3.8.10 (select the Python 3.8 bindings option)
PyADI-IIO
- Webpage: Install using Python package installer pip
- Requires: LibIIO with Python bindings (pylibiio == 0.23.1) and NumPy
Keysight IO Libraries Suite
- Webpage: www.keysight.com/find/iosuite
- Requires: Python
- Installs: VISA Library (along with others)
Firmware Updates
- Oscilloscope: Keysight MSOX3014T firmware version 7.50.20211028 retrieved from https://www.keysight.com/us/en/lib/software-detail/instrument-firmware-software/installing-infiniivision-3000t-xseries-oscilloscope-firmware-2573488.html and installed using an USB drive.
- Spectrum Analyzer: Keysight N9914B FieldFox firmware version A.12.35 from https://www.keysight.com/us/en/lib/software-detail/instrument-firmware-software/fieldfox-current-firmware-new-cpu-2637691.html (USB drive)
Installation Instructions
Key Note: Try to run all the setups as administrator and select any path in C drive other than your user folder if that option is available. You can also verify this later by making sure that the folder path of the executable file does not contain your username.
Google Chrome and Git
Install Google Chrome https://www.google.com/intl/en/chrome/?standalone=1 Copy the setup file to a location in the C drive and the run the installer, also make it the default browser.
Install GitHub Desktop https://github.com/desktop/desktop/issues/7582 Please follow the second comment by ‘steveward’ and install the .msi file (as administrator). Whenever a new user logs in the PC, GitHub Desktop auto installs itself on that users folder. This will be beneficial as we don’t have to take special care for cloning the entire course folder from GitHub.
Note: We can install TeamViewer in case we need remote access.
Python
Visit python.org and scroll down to the Files section and click on the recommended Windows installer (64-bit). As a safe intermediate step you may first uninstall the currenly Python 3.7.4 version that you have by running the installer and selecting the uninstall option.
Right click and run the installer you just downloaded as administrator and then select
Add Python 3.8 to PATHin the checkbox shown at the bottom of the installation page. Click “Custom Installation” and follow the steps, we need to make sure that the folder path is general and not in our user.Congratulations! You have just succesfully installed Python. To check if Python is properly installed and added to PATH, first open the “Command Prompt” by typing
cmdin your Cortana search box. Then, typepythonin your command window and press “Enter”. You should expect to see information similar to the following:PPython 3.8.10 (tags/v3.8.10:3d8993a, May 3 2021, 11:48:03) [MSC v.1928 64 bit (AMD64)] on win32 Type "help", "copyright", "credits" or "license" for more information. Type "quit()" to exit Python and return to the command window.Now run the command prompt as an administrator and upgrade your pip package by running
pip install --upgrade pipcommand.
Numpy, MatPlotLib, SciPy, Jupyter Notebook, JupyText and PySimpleGUI
- Once we have Python installed, we could install other tools such as NumPy, MatPlotLib, SciPy, Jupyter Notebook, JupyText and PySimpleGUI using the “pip install” command (run command window as administrator then it should show
C:\system\windows32and not your username). Type pip install xyz in thr command window; the xyz should be replaced (one by one) by numpy, matplotlib, scipy, notebook, jupytext and pysimplegui. - To test whether all these packages are installed and can be imported we can use command prompt and start python, then use the command import ‘package-name’ and press enter (for pysimplegui use PySimpleGUI, check https://yasoob.me/2013/07/28/what-is-init-py/ for more details).
Note: a) NumPy library is a collection of mathematical functions and it supports arrays and matrices. b) MatPlotLib library used for Matlab like plotting. c) SciPy library has modules that can be used for scientific computational tasks such as optimization, linear algebra, etc. d) PySimpleGUI library is used for fast and simple GUI programming. e) JupyText is used to open Jupyter notebooks as text files.
ADALM-2000 and Pluto Drivers
- Visit https://github.com/analogdevicesinc/plutosdr-m2k-drivers-win/releases and download “PlutoSDR-M2k-USB-Drivers.exe - v0.8” and install it.
Note: These drivers set up communication between our PC and ADALM Pluto/M2K (interfacing software or applications to hardware).
LibIIO
- Visit https://github.com/analogdevicesinc/libiio/releases and download the .exe file and run installer as admin.
Note: Abstracts low-level details of hardware and provides and simple yet complete programming interface to ease development.
LibM2K
- Visit https://github.com/analogdevicesinc/libm2k/releases/tag/v0.5.0 and click to download the libm2k Windows installer “libm2k-0.5.0-Windows-setup.exe”
- Run the installer (as administrator) and make sure to deselect just the option ‘install Python 3.7 bindings’, then click next to finish installing libm2k on your Windows system.
- To check the installation we should again run the command ‘import libm2k’ in the python terminal (in command prompt type python and click enter).
The idea of first installing libiio and then overwriting it is taken from the question thread https://github.com/analogdevicesinc/libm2k/issues/98.
Note: C++ library for interfacing with ADALM2000.
PyADI-IIO
- Run “pip install pyadi-iio” to finish installation (as admin).
- To check installation run ‘import adi’ in Python terminal, refer https://pypi.org/project/pyadi-iio/.
Note: Python abstraction (reducing details) module for ADI hardware.
PyVISA
- Open command prompt window (as admin) and type: pip install pyvisa.
- To check installation run the command ‘import pyvisa’ in python terminal.
Note: Package to control all kinds of measuring devices independent of their interface (follows VISA standards).
Keysight Connection Expert
- Visit www.keysight.com/find/iosuite then scroll down and click ‘Keysight Instrument Control Bundle Download’ and enter your name and ID on the next page. Install all the three softwares as an administrator and/or make sure a different path other than your user one is mentioned in the directory.
Note: If some Keysight software is already installed you may need to uninstall it first before above step. If installation gives you some error due to this, just go to Control Panel and confirm under the installed programs.
Note: Automatically detects Keysight instruments and configures the interfaces for applications to communicate with the instruments.
FFmpeg and FFplay
- To install ffmpeg and ffplay on Windows, visit: https://www.gyan.dev/ffmpeg/builds/ and download ‘ffmpeg-release-essentials.zip’ (version should be 4.4.1).
- Unzip the downloaded .zip file (in the C drive), find and open the folder “bin”.
- Copy the directory path in the address bar of Windows Explorer and add it to “PATH” under system environment variables.
If you not familiar with adding directories to Windows PATH, the linked article could be helpful: https://helpdeskgeek.com/windows-10/add-windows-path-environment-variable/
Note: Multimedia (software) framework for related functions.
IPerf
- Download Iperf zip file through the link: https://iperf.fr/download/windows/iperf-2.0.9-win64.zip
- Extract the downloaded zip file (in the C drive) then in the unzipped folder “iperf-2.0.9-win64” find the executable named “iperf”.
- Again, copy the directory path in the address bar of Windows Explorer and add it to “PATH” under system environment variables.
Note: Tool to actively measure the max achievable bandwidth on a connection.
WireShark
- Download the Wireshark installer by visiting https://www.wireshark.org/download.html
- Run the installer (as administrator) and follow the instructions to install Wireshark on your computer. Make sure you install the Npcap Loopback Adapter during the installation.
Note: Open source cross-platform packet analyzer for troubleshooting and analysis of a network.
Uninstallation Instructions
In case a computer needs to be refreshed, we include these instructions to remove everything before trying to install the software above from scratch.
- First Step is to uninstall everything that is relevent to all the software mentioned above using control panel.
- The above includes stuff related to GitHub, IVI, Keysight, Libiio & m2k, Microsoft Visual C++/studio, NpCap, Pluto/M2k drivers, Python, VISA, Wibukey, ADI Driver packages Windows, Wireshark.
- Now we need to manually delete some folders in the C drive as follows: a) Remove ffmpeg and iperf from system path environment variables and delete those folders in C drive. b) Go to ‘Program files’ and first delete Python38, then delete IVI and Keysight related folders too. c) Go to ‘Program files (x86)’ and delete Agilent, GitHub, IVI, Keysight, Visual Studio, NI and Wibukey related folders. d) Go to the hidden folder (select view hidden in the file explorer) ‘Program Data’ and delete Agilent, IVI and Keysight. e) Go to Users and then to your folder. Now first go to Documents and delete the GitHub folder (radioware repository) and come back to Users folder. Then delete .ipython, .jupyter, .matplotlib folders and .gitconfig file. Also go to the hidden folder ‘AppData’, delete GitHub and Jupyter folder in Roaming. Now go to the local folder and first delete the pip folder and then delete GitHub, Keysight and temp folders. f) Go to Windows folder and delete Temp.
You can now restart the machine.
Summary of Software Versions
| Software | Version |
|---|---|
| Google Chrome | 96.0.4664.111 |
| GitHub Desktop | 2.9.6 |
| Python | 3.8.10 |
| ADALM Pluto/2000 Drivers | 0.8 |
| libiio | 0.23.0 |
| libm2k | 0.5.0 |
| pyadi-iio | 0.0.11 |
| Keysight Instrument Control Bundle | 2020 |
| ffmpeg | 4.4.1 |
| iPerf | 2.0.9 |
| Wireshark | 3.6.1 |
| NumPy | 1.21.1 |
| MatPlotLib | 3.5.0 |
| SciPy | 1.7.3 |
| Jupyter Notebook | 6.4.6 |
| PySimpleGUI | 4.55.1 |
| JupyText | 1.13.5 |
| PyVISA | 1.11.3 |
